

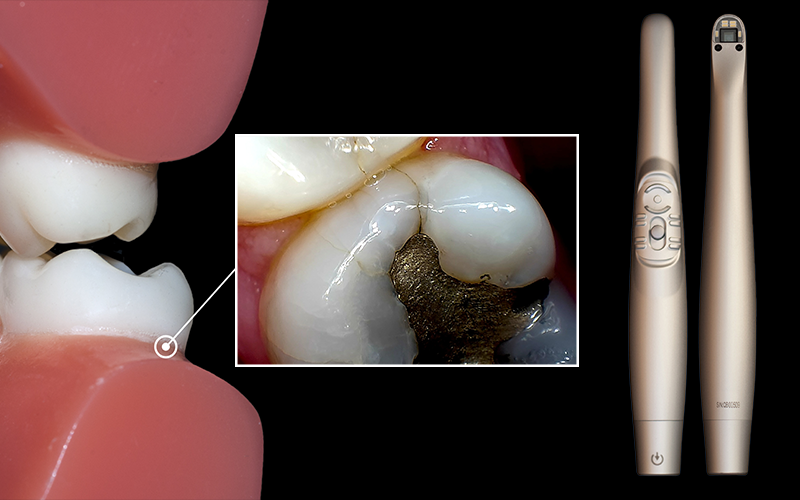

Most dental practices use intraoral cameras to increase patients’ awareness and acceptance of various treatments. In addition, many dentists use these cameras to diagnose issues. In order for this to work, the images must be crisp and clear. Fortunately, there are some tips you can follow to get diagnostic-quality images from intraoral cameras. These tips are easy to follow, so you can implement them immediately.
Tip 1: Use the Intraoral Fulcrum for Better Stabilization
Camera stabilization is essential if you’re going to get diagnostic-quality images. Your stabilization strategy depends on the images you are gathering. If you are getting images of two to three teeth, balance the camera on the incisal edge of the opposing arch. However, if you are getting a macro image or just photographing half of a tooth, balance it on the same arch as the tooth. This will allow you to position the lens close to the tooth, making it easy to get macro shots.
Once the camera is in place, keep it steady with both hands. Then, activate the capture buttons. It is important that you stay still during this process. The slightest movement will cause the images to blur.
Tip 2: Focus the Camera
Some intraoral cameras include focus adjustment. If yours has this feature, use it so you can get clear images.
You have two options for focusing the camera with the focus adjustment feature. First, you can focus on the tooth and then position the camera. If you do this, you will likely be up close to the tooth, which means the camera will be on the macro focus setting. Focus the image and then position the camera.
If your camera is already in position, use the focus feature to focus on the tooth. Once it is focused, you will be ready to take the image.
If you do not have a focus feature, you can still focus your camera. You will need to move the camera in and out in order to find the proper depth of field. This may take some time, but it is worth the effort. Proper focusing is essential if you are going to have diagnostic-quality images.
Tip 3: Dry the Area
Intraoral cameras take foggy images when photographing wet posterior areas. In addition, saliva creates a bright reflection when photographed. Using air, dry the entire area before taking the image. Once it is dry, take the image quickly, before the saliva builds up again. If you wait too long, you will have to go through the process once more.
You easily capture diagnostic-quality images with these tips. You can use the diagnostic-quality images to find problems and to include patients in the treatment process. This gets everyone onboard for the treatment plan, whether the patient needs a simple filling or a more advanced procedure such as implants or a root canal. With the patient onboard, you can move forward with the treatment plan with ease.
Want more technology tips? Subscribe for email updates so you never miss another one!
Leave Comment